

Please note that these mushrooms are not standing on their own, they are relying on the help of pins. :-)
- pretty fabric (cotton) for the top of the cap
- neutral fabric (cotton) for the bottom of the cap (gills)
- neutral fabric (I am using light weight linen) for the stem
- soft fill
- sewing accessories (the mushrooms can be sewn by hand)
Step 1
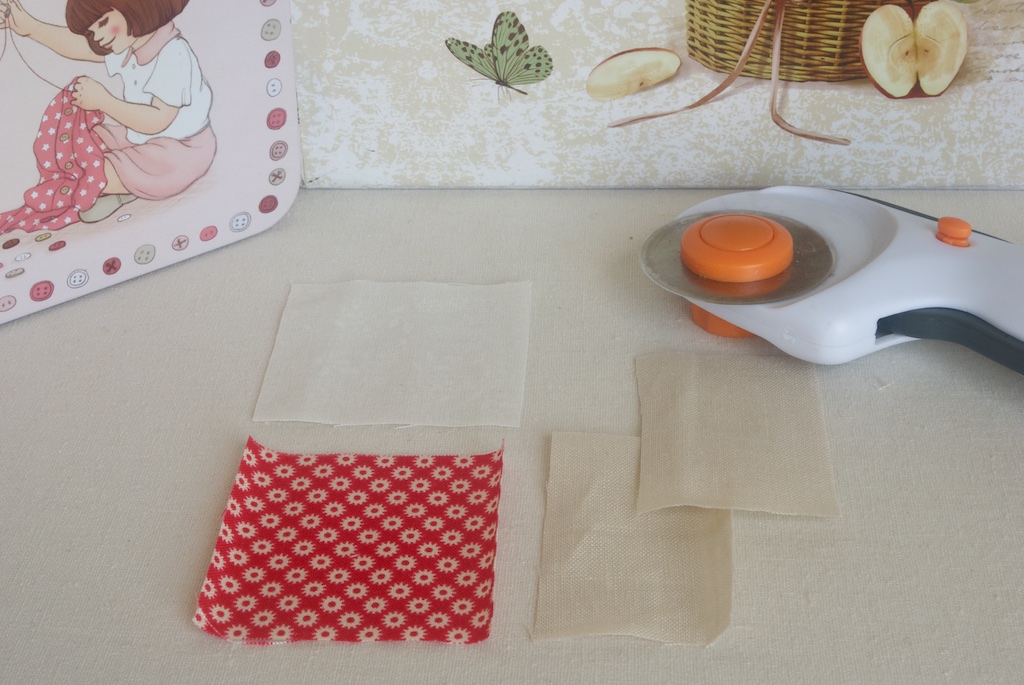
Cap: Cut one piece of printed cotton and one in a neutral colour for the cap, about 5.5cm by 5.5cm.
Stem: Cut two pieces of fabric in neutral colour for the stem, about 4.5cm by 6.5cm each.
Cap: Cut one piece of printed cotton and one in a neutral colour for the cap, about 5.5cm by 5.5cm.
Stem: Cut two pieces of fabric in neutral colour for the stem, about 4.5cm by 6.5cm each.
Step 2
Cap: Place the pieces right sides together and pin. Trace a circular objects that is about 4.5cm in diameter on to the fabric. Mark an opening.
Stem: Draw a rectangle that is narrow at the top (about 2.5cm) and wider at the bottom. Use a circular object to create curved corners (the bigger the diameter of the object, the more curvier bottom corners are going to be).

Step 3
Cap: Set your machine to the longest stitch and make sure that you leave a long tails of thread at the beginning and end of your seam. Stitch along the marked line leaving the opening unstitched.
Stem: Stitch along the marked line, making sure to backstitch at the beginning and the end of the seam (start at the top, go all the way down and then up again).

Step 4
Trim all the corners on both parts.

Step 5
Cap: Gently pull on the thread to slightly gather the fabric. Do not gather too much, just a little bit to give it an open cup shape. Tie the ends of the threads.
Stem: Turn the stem the right side out. Tuck the top edge of the fabric in about 0.5cm.

Step 6
Fill both shapes with soft fill.

Cap: Hand stitch the opening closed.

Step 8
Now is the tricky bit attaching the stem to the cap. You can pin the stem in place or simply hold it with your fingers. The trick here is to pick the fabric of the cap about 2mm further away from the stem (just imagine that the circle you are attaching the stem to is slightly bigger than the diameter of the stem).
Note: You can fill the bottom of the stem with dry rice to give it a bit of weight. You can also make a boxed bottom in step 3 so the mushroom can stand on its own.

Once it's done, push the soft fill around inside the fabric with your fingers to give the mushroom its shape if needed. If you are making a hanging ornament, just add a thin cord to the top of the cap. Done!

Is your basket getting full? Happy mushroom picking! Larisa xox
This is so cute Larisa. Tks.
ReplyDeleteBea
I am really glad you like it, Bea. Lovely to see you on my blog! :-)
DeleteAdorable!
ReplyDeleteThank you very much, Agnes!
DeleteThese would make lovely pin cushions
ReplyDeleteI haven't thought about that, Dina. What a great idea! The stem would have to be much shorter and wider, and definitely filled with rice or something else to make it heavy. Thank you!
Delete